Aleut / Eskimo Style

Paddle Making (If you use information from these pages for any commercial gain then they are copyright. Otherwise use them freely.)

The page with the pictures may be downloaded from here

Comments to me Chris Brown

Links to other paddle makers articles - Mask , Sea Paddler, Sea Kayaker

In my humble opinion Eskimo or Aluet style paddles are preferable to the 'conventional' high tech 'river' paddle for sea kayaking.
To this end I decided to build my own.


Fortunately many kind souls in the newsgroup rec.boats.paddle sent me information. Thank you.

The material used for the first two paddles was scaffolding board. These had been used on the oil rigs in the North Sea so I assummed they must be well weathered.

These two pictures above show a conventional paddle then a Greenland style short Storm Paddle. After that is the first paddle I made - a Greenland style paddle. Next to that is an oar from an ocean going Shetland rowing boat called a 'yoal' or 'sixareen' or 'sixern'. The important thing to note is the blade shape - it is long and thin. The blade shape used by the kaykers from the Aleutian Isles to Greenland for work on the sea.
At the right is a plank in the process of being converted in to a paddle.

Eskimo/Aluet Sea Kayaking Paddle - A method of construction

This is just a method I am presently using, there are others. Try the links above.

Size the paddle - Conventionally the length of the paddle is found by standing flat on your feet and raising an arm above your head. From the tips of your fingers to the floor is the paddle length. This probably works well for for a kayak with a low fore deck. Most kayaks don't have low fore deck so the paddle has to be longer. In this example I found a piece of packing crate about 9 foot long.

Other wood sizes - The width of the wood has to be at least 4 inches and the thickness 1.5 inches

Marking out - Remove any nails or staples from the wood and pick one of the flat faces. Draw a line down the middle lengthways and then draw a line across the face at the mid point of the length.Then take a stick and hold it at one end then just use the other hand to hold the stick approximately shoulder width apart. Note the distance from the outside of the hands.Return to the plank and mark off on the centre line from the mid point half the length just measured. Then do this for the other side of the centre point. At these two points either side of the centre draw a line across the board. These two lines define the loom length. To get its thickness draw a line three quarters of an inch eitherside of the centre line between the loom end lines. These are the loom lines. Then on the lines that define the ends of the loom put a mark three quarters of an inch further out towards the edge of the board from the loom lines. After that put a mark on the loom lines two and a quarter inches from the loom end line. Join this point an the previous point you made with a line -- Your getting confused!

Use the diagram above. Then at the length of each blade draw a line across the wood. These are the blade end lines. Decide how wide you want your paddle and mark half the width from each centre line on either side of it. Then join with a line from the points at the end of the loom - yes here is another diagram!!
Blade width is a matter of choice. The first I made was rather wide. So you will probably start off with 4 inches plus and if you decide to make another blade the blade width will be reduced. The anthropromorphic method is to hold the thumb and first finger of your left hand in a wide 'C' shape trying to keep them as parallel as possible. The inside distance is the width of your paddle blade - the width you can grip. For me the blade should be about 3 and a half inches.
If you try extended paddle strokes such as some of the Greenland sculling braces then the paddle width will be crucial to your confidence and comfort.
Now you have a plan view of your paddle shape laid out on the plank. So now cut out that shape. I usually start with the loom using a saw and a chisel.
I use an adze to do the sides of the blades - it is more difficult than using a saw but gives you a feel of what it must have been like for Inuits to construct a paddle.
So now you have a paddle in plan view
Now you have to draw the blade thickness on the edge of the paddle. You have control here on how hefty the paddle is. The thicker the blade the heavier it is. I use 1 inch at the loom and quarter inch at the tip.
Also at this point you have to decide if your blade is going to be single or double sided. If I read it correctly the Greenland paddle is double sided and the Aleutian paddle is single sided (Wolfgang Brincks book). The diagram is for a single sided blade. Basically I am lazy. If you want a double sided blade work around the centre line of the blade rather than the front face of the wood.

    Next you have to cut the slope of the blade from the tip to the loom. This can be a real bind. I have tried it with an adze and got very fed up. A saw is the answer but takes a long time. A circular saw will do the job but has to be cut from both edges as most only cut to 2" depth.
    I haven't used one but a power plane might be a good power tool for this job. But why use power tools? This is a hand made paddle! (Though you will curse this idea at times!)

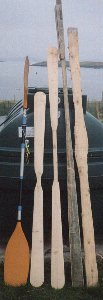
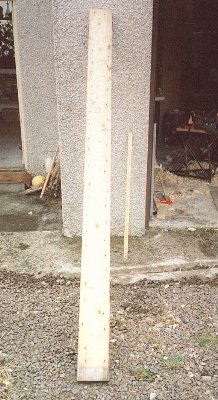
You now have the paddle blank. All the gross work has been done. Now to the bits I enjoy

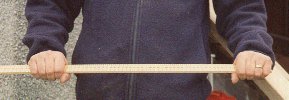
The next thing I tackle is shaping the loom. For the Greenland style it is usually an oval with its long axis at 90 degrees to the width of the blade. I have seen it written that the loom was sometimes the square section with the corners rounded off. I tried this with my first paddle It wasn't bad and gave a good grip in the hand butnyou have to size it to ensure it is not too big for you.

The loom I do now is geared around the blade that is worked on one side, the Aleut style, and consists of a half oval on the worked side of the blade and a rounding of the corners on the none worked side - front face.

The tools I use are a flat bladed spokeshave and a small surform.

As you can see from the image I have Wolfgang Brincks book The Aleutian Kayak. One day I just may have the time and space to take paddle making into kayak making

Dont work to completion just until the general shape is there.

Now that the basis of the loom has been shaped it is time to start on the blades. Firstly I redraw the centre line down the sawn side of the blade. Then I draw parallel lines at half an inch either side of the centre line. Then on the blade edges I run a line parallel to the front face. The distance from the front place depends on how thick your blades are going to be. I run a line at an eigth inch but the oar I have has a much thinner blade so I will try a sixteenth inch, or less, in future.
For the actual shaping of the blades I use the spoke shave and a block plane. Basically you want to use these tools to connect the lines on the face of the blade to the lines on the edge of the blade. The area you do not want to plane is the one inch down the centre of the back of the blade and the sixteenth of an inch at the edge

Remember dont work to completion. Once a reasonale bit has been done move on to the other side of the blade or the other blade

The blade tips can be curved if you wish.

Once you have done that you have a rough paddle. Continue working around the blades and loom until you think you are happy that there is nothing more to remove. I know it sounds weird but when to stop working on the paddle is subjective. You will get to a point were a fine sandpaper is required to finish off the surface. Some times I finish with pencil lines still showing.

As of yet I have not used finishes on my paddles. They seem to survive alright. Remember this paddle is not designed for a lifetimes use and one day it may break. So make several paddles.

And one of the most important things is to go and use your paddle. Dont get hung up on perfecting the perfect paddle.

In use the 9 foot paddle has a slow cadence and at sprint speed has as much pulling power as those with modern paddles.