|
|
Teaching First Aid can be difficult, it is a very important and serious
subject but somehow, placing crisp white bandages onto an imaginary injury
just does not conjour up the image of a real accident.
Over the years, the Troop has come up with a number of ways of doing
casualty simulation on a shoestring.
The Casualty Simulation Kit
For the Kit you will need the following:-
|
 |
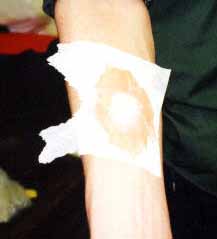
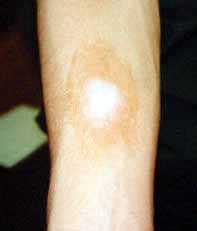
| BURNS
Burns are great fun to play with. Not only do they look realistic but the blister will burst if handled too roughly.
|
  |
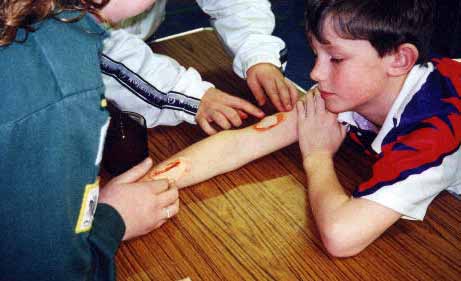 |
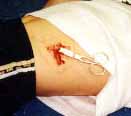
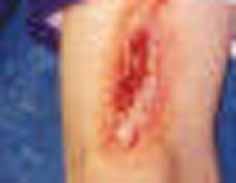
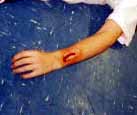
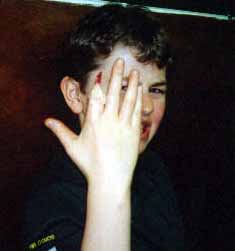
Wounds
This is what the Scouts really love, blood and guts!
|
How To Make A Nasty Wound
|
|
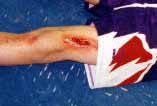
| When you have finished with the basics you can really have fun.
Open fractures with bones sticking out of the ripped skin.
De-gloved fingers (see right) where the flesh has been ripped off the finger taking most of the bone with it (finger bent over, false stump made and a broken chicken bone used) Let your imagination run riot! |
 |
So How do I use this in a Troop Night?
Well what we normally do is to have the Patrols decide on a plausible
accident and the dress up one of the Patrol as an accident victim. After
half an hour of casualty simulation the Patrols move to a neighbouring
Patrol's corner and must treat the casualty as best they can.
One warning though, post a warning on the Scout Hall door. Some
of the wounds can look very real and can cause the GSL/ADC/DC/Parents to
panic.
Another thing, although this is not real and the Scouts know it
is all fake, some Scouts can get a bit queasy about this so it is a good
idea to have an alternative for them to do in another room
The Delia
Smith Guide to making Blood and Flesh
| Flesh
To make flesh, you will need the following:-
|
Put all the indredients into a pan, stir and cook until the mixture
forms a soft ball.
Couldn't be easier. Making the flesh to the correct skin tone depends largely upon what
skin tones you have in you Troop. I can get away with the bog standard
pink tone most of the time. Minor variations in the pink skin can be dealt
with by make up.
|
| Blood
To make blood, you will need the following:-
|
Make a paste of flour and a little water and blend it into the rest
of the water.
Slowly bring to a simmer and stir constantly until the mixture just begins to thicken. The exact amount you will need will depend upon the number of Scouts you have, however I rarely use more than a cupful. nothing looks more fake than buckets of blood! The mixture should be used quickly as it will thicken on standing. |
WARNING
Some food colourings can stain clothes or skin. Please try it out before you use it otherwise you may end up with a huge cleaning bill, multi-coloured Scouts and a queue of irate Scout parents.