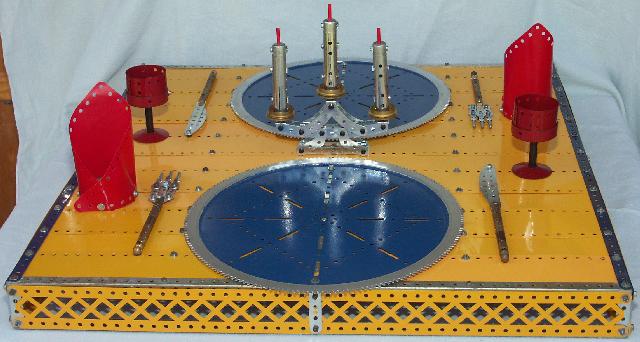
The Candlelight Dinner for Two with a glass of the Perfect Red
Designed, described and photographed by Paul Dale
DESCRIPTION

Designed, described and photographed by Paul Dale
The table top is made from a square of 24 1/2" Angle Girders topped with twenty four 12 1/2" x 2 1/2" strip plates. These are secured at their outer edges to the side members of the square and at their mid points to an underlying 24 1/2" Angle Girder. They meet in the middle of the table top again with an underlying 24 1/2" Angle Girder, however the strip plates are mostly left free here as bolts would interfere with the Geared Roller Bearing Plates. The table top is extended downwards using 2" Angle Girders and 12 1/2" Braced Girders and another square of 24 1/2" Angle Girders to make a shallow box.
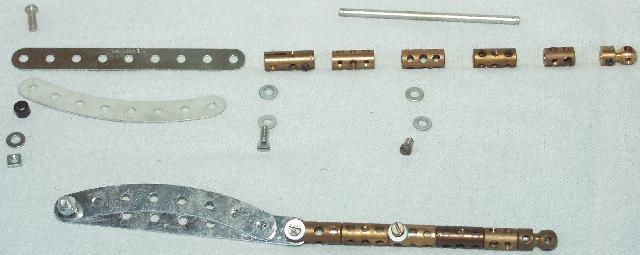
A variety of couplings along an axle makes the handle, the sequence of which is visible in the picture above. The handle ends with a Strip Coupling which attaches the knife blade. The knife blade consists of a 4 1/2" Perforated Strip and a 4" Curved Strip joined together only at the tip. The 4 1/2" Perforated Strip is attached to the Strip Coupling. The vertical bolts in the picture illustrate where the knife is attached to the table top.
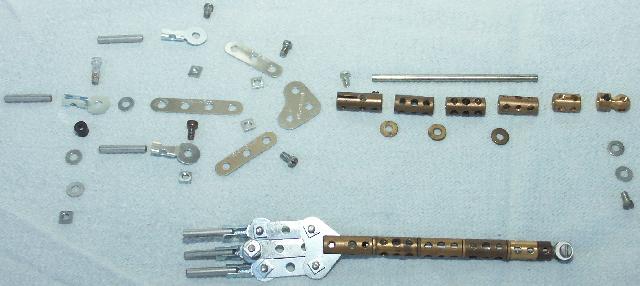
The forks have handles similar to the knives, however, some additional spacing washers are required to line the attachment holes up with the holes in the strip plates of the table top. The flat of the fork is made from a 1" Corner Bracket, one 2" Narrow Strip and two 1 1/2" Narrow Strips. the 2" Narrow Strip and the apex hole of the Corner Bracket are attached to the Strip Coupling. The prongs of the fork are each made from a 1" Axle and a Rod and Strip Connector, the latter being bolt to the end holes of the three narrow strips. The fork is attached to the table top by the bolt through the central prong's Rod and Strip Connector and by a second bolt through the Handrail Coupling.

The glasses are constructed from a Conical Disc, a Boiler End and two Flexible Plates rolled into a circle. In the pictures both Flexible Plates are 5 1/2" x 1 1/2", however other sizes and combinations will work as well. The flexible plates are attached to the boiler end by a single bolt. The stem of the glass is made from a Screwed Rod covered by six Plastic Washer Spacers above the base and an additional one between it and the table top.
The glasses are, of course, constructed in medium red parts.
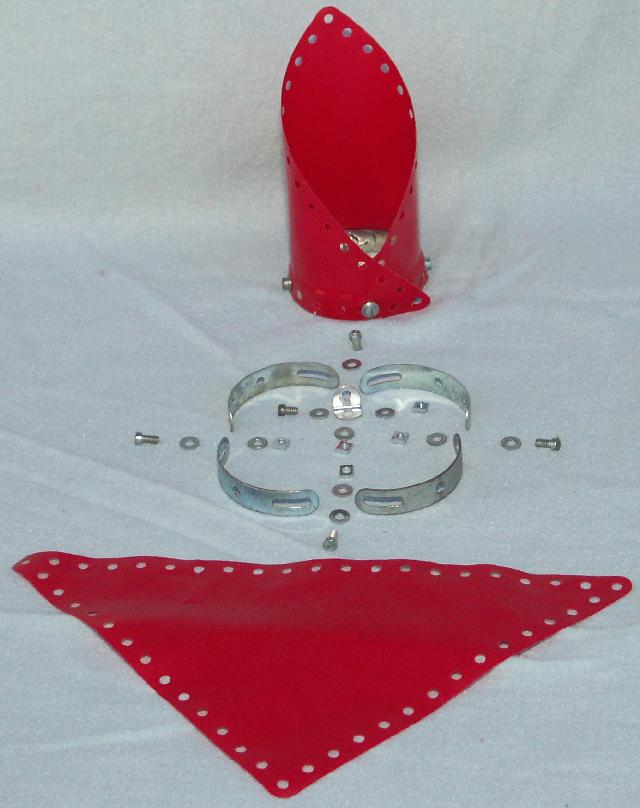
The napkins are made from four Formed Slotted Strips arranged in a circle around which a Triangular Fabric Plate is placed and bolted by the central hole on the long edge and the fourth holes away from the centre of the plate to the overlapped slotted holes of circle of strips. The eighth holes from the middle of the fabric plate are bolted together to the circle of strips. The fabric plate overlaps itself by five holes with the aforementioned attaching bolt being the middle of the five. Finally, the circle of strips is attached via an Angle Bracket to the table top.
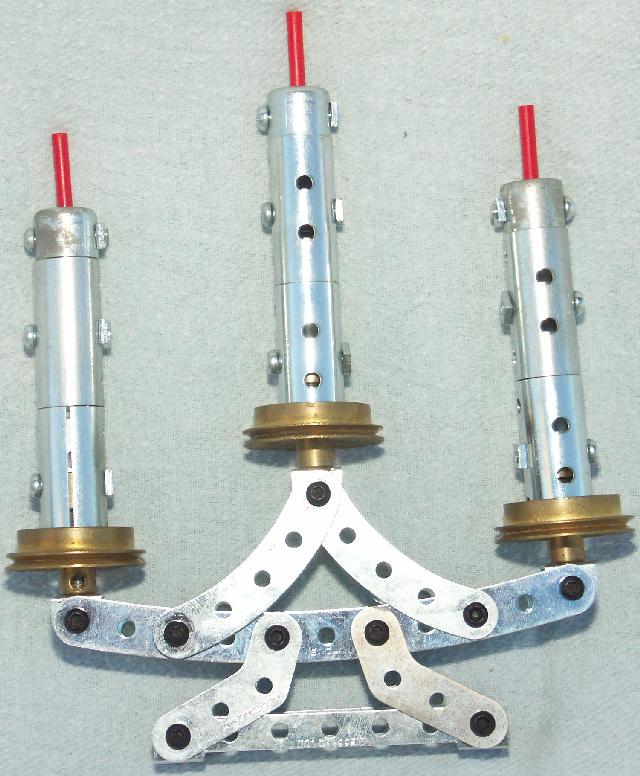
Construction of the candlestick is best done as two stages. The first is to build the base and attach this to the table top. The second is to construct the candles and to then attached these to the base.
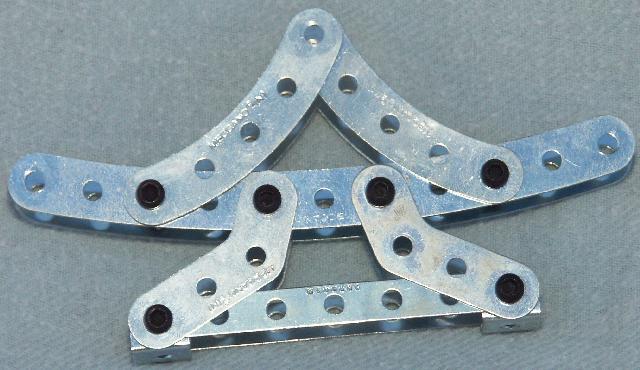
Each side of the candlestick base is constructed from two 5 1/2" Curved Strips, two 2 1/2" Curved Strips (not stepped), one 3 1/2" Narrow Strip and two Obtuse Corner Brackets. The two sides are joined together by a pair of Double Brackets where the base attaches to the table top. Another three Double Brackets will be attached later at the top to hold the sides together and the candles in position.

Each of the three candles is made identically. The base is a Flanged and Grooved Wheel atop a Double Bracket. Over this are a pair of Sleeve Pieces topped by a Chimney Adaptor with a red Mini Shock Absorber representing the flame. Inside these are a pair of 3 1/2" strips spaced at the top by the Mini Shock Absorber, in the middle by a Plastic Washer Spacer and at the bottom by a Threaded Boss. The latter provides the 1" mounting bolt something to screw into and it is placed parallel to the strips. The circular parts are each bolted to the pair of strips with a single 3/4" bolt.
These instructions and the accompanying pictures are copyright material, and all rights are reserved. They are made freely available to Meccano modellers on condition that they are not copied and distributed in any form for sale, whether or not the sale is for profit or merely 'at cost'. Nor may they be distributed in incomplete form. Printed copies may however be made freely for personal use.
![]() © 2005, Paul Dale (pauli@snapgear.com)
© 2005, Paul Dale (pauli@snapgear.com)
"The Meccano Model Library" website is owned and run by Chris Bourne (cfpb@lineone.net)
Website designed and maintained by Donna Smillie (dms@zetnet.co.uk)
http://www.users.zetnet.co.uk/dms/meccano/dale/dinner/index.html